内存取证-Volatility3手动导出Linux系统符号表
└─# vol -f sample.mem linux.pstree.PsTree
Volatility 3 Framework 2.11.0
Progress:  100.00               Stacking attempts finished
Unsatisfied requirement plugins.PsTree.kernel.layer_name:
Unsatisfied requirement plugins.PsTree.kernel.symbol_table_name:

A translation layer requirement was not fulfilled.  Please verify that:
        A file was provided to create this layer (by -f, --single-location or by config)
        The file exists and is readable
        The file is a valid memory image and was acquired cleanly

A symbol table requirement was not fulfilled.  Please verify that:
        The associated translation layer requirement was fulfilled
        You have the correct symbol file for the requirement
        The symbol file is under the correct directory or zip file
        The symbol file is named appropriately or contains the correct banner

Unable to validate the plugin requirements: ['plugins.PsTree.kernel.layer_name', 'plugins.PsTree.kernel.symbol_table_name']
vol3分析Linux内存通常都会遇到上面的报错,就是缺少对应的系统符号表。但网上介绍Volatility3的文章大部分都是都把工具的命令行翻译成中文,当真的去实操vol分析内存时会发现有太多的坑,因为分析内存是需要当前系统的符号表。
vol3自带的Linux符号表非常少,而Linux的kernel版本又非常众多,大多数情况都需要在对应的机器上手动导出符号表才能开始分析内存。
安装kernel-debuginfo
因为Linux的内核版本非常多,并且yum、apt源不一定有提供当前操作系统版本的kernel。配置一些境外的镜像源又需要给主机配置代理,过于麻烦。
[root@localhost ~]# uname -r
3.10.0-1160.71.1.el7.x86_64
有一个最简单的办法就是直接谷歌搜索对应kernel版本的debuginfo。这里以centos7为例
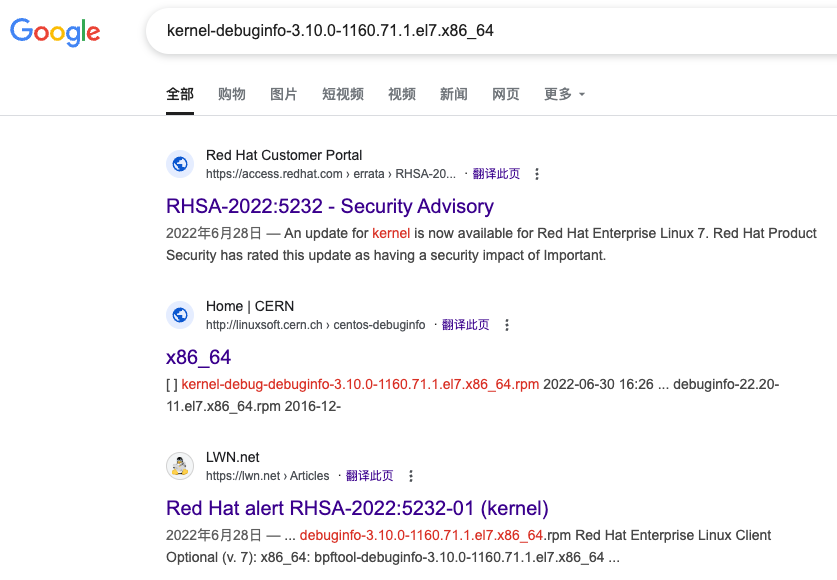
谷歌搜索对应内核版本的debuginfo然后直接下载。
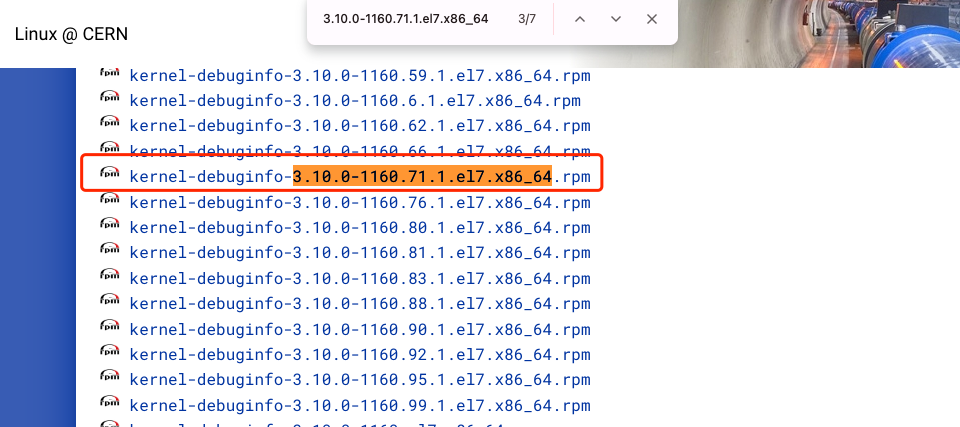
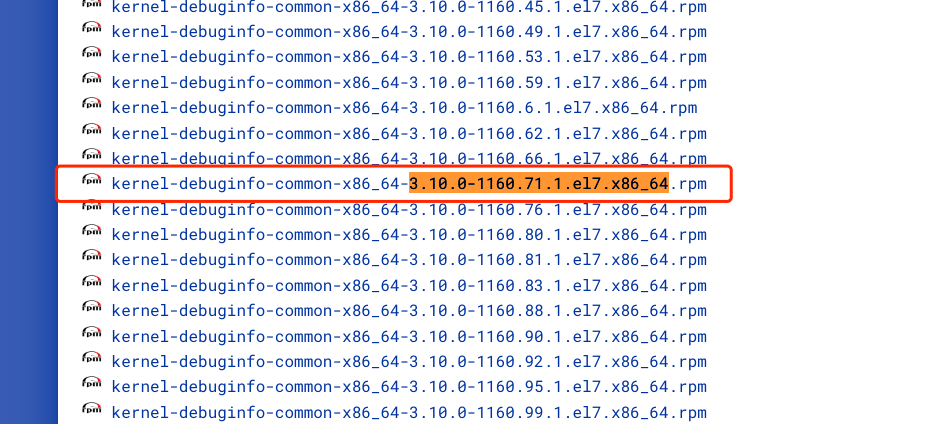
在页面中搜索下载然后再上传到服务器上安装,注意这里需要下载debuginfo和debuginfo-common两个包。
[root@localhost tmp]# ls kernel-debuginfo-*
kernel-debuginfo-3.10.0-1160.71.1.el7.x86_64.rpm  kernel-debuginfo-common-x86_64-3.10.0-1160.71.1.el7.x86_64.rpm
[root@localhost tmp]# rpm -ivh kernel-debuginfo-3.10.0-1160.71.1.el7.x86_64.rpm
警告:kernel-debuginfo-3.10.0-1160.71.1.el7.x86_64.rpm: 头V3 RSA/SHA256 Signature, 密钥 ID b6792c39: NOKEY
错误:依赖检测失败:
        kernel-debuginfo-common-x86_64 = 3.10.0-1160.71.1.el7 被 kernel-debuginfo-3.10.0-1160.71.1.el7.x86_64 需要
[root@localhost tmp]#
[root@localhost tmp]# rpm -ivh kernel-debuginfo-common-x86_64-3.10.0-1160.71.1.el7.x86_64.rpm
警告:kernel-debuginfo-common-x86_64-3.10.0-1160.71.1.el7.x86_64.rpm: 头V3 RSA/SHA256 Signature, 密钥 ID b6792c39: NOKEY
准备中...                          ################################# [100%]
正在升级/安装...
   1:kernel-debuginfo-common-x86_64-3.################################# [100%]
[root@localhost tmp]# rpm -ivh kernel-debuginfo-3.10.0-1160.71.1.el7.x86_64.rpm
警告:kernel-debuginfo-3.10.0-1160.71.1.el7.x86_64.rpm: 头V3 RSA/SHA256 Signature, 密钥 ID b6792c39: NOKEY
准备中...                          ################################# [100%]
正在升级/安装...
   1:kernel-debuginfo-3.10.0-1160.71.1################################# [100%]
注意需要先安装debuginfo-common,再安装debuginfo。
安装dwarf2json
https://github.com/volatilityfoundation/dwarf2json
直接clone需要在本地编译,建议直接下载release版本。
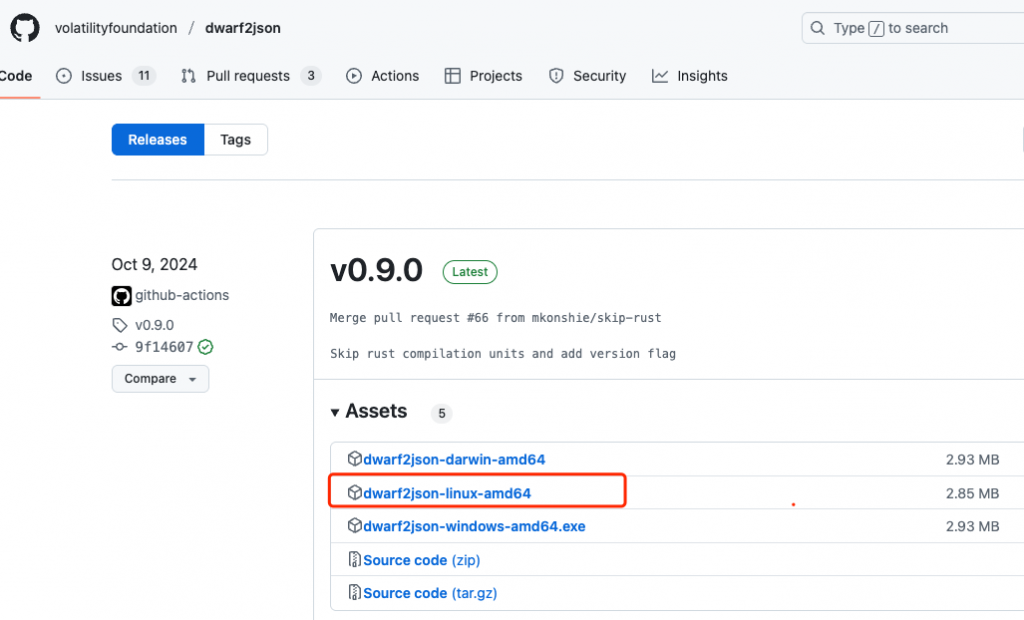
wget https://github.com/volatilityfoundation/dwarf2json/releases/download/v0.9.0/dwarf2json-linux-amd64
chmod +x dwarf2json-linux-amd64
需要提供dwarf2json导出符号表的参数。
[root@localhost tmp]# ./dwarf2json-linux-amd64
用法: ./dwarf2json-linux-amd64 命令

一个用于生成中间符号文件 (ISF) 的工具

命令:
  linux  为 Linux 分析生成 ISF
  mac    为 macOS 分析生成 ISF

选项:
  -h, --help     显示此屏幕。
  -v, --version  显示工具和输出模式版本。
[root@localhost tmp]# ./dwarf2json-linux-amd64 linux
未指定任何文件
用法: dwarf2json linux [选项]

      --elf PATH           用于提取符号和类型信息的 ELF 文件路径(必需)
      --elf-symbols PATH   仅用于提取符号信息的 ELF 文件路径
      --elf-types PATH     仅用于提取类型信息的 ELF 文件路径
      --system-map PATH    用于提取符号信息的 System.Map 文件路径(可选但推荐)
dwarf2json导出符号表
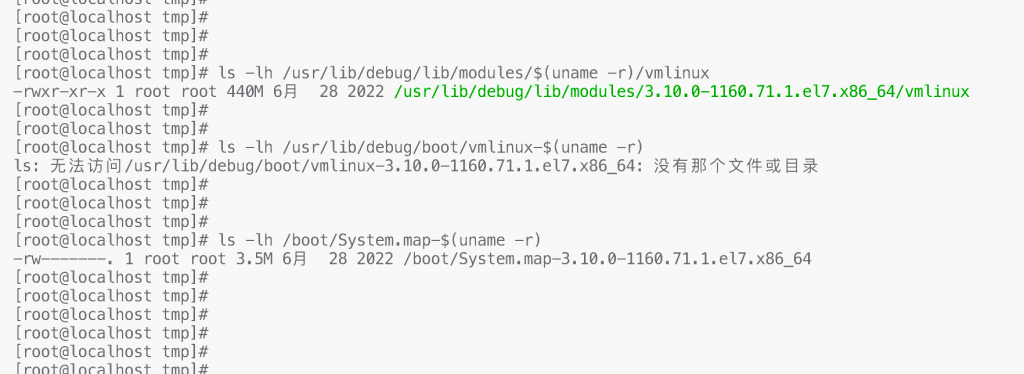
首先要找到当前系统中System.map和vmlinux的位置。
vmlinux文件(包含调试信息的内核):
# 通常位于:
/usr/lib/debug/lib/modules/$(uname -r)/vmlinux
# 或者
/usr/lib/debug/boot/vmlinux-$(uname -r)
System.map文件:
# 通常位于:
/boot/System.map-$(uname -r)
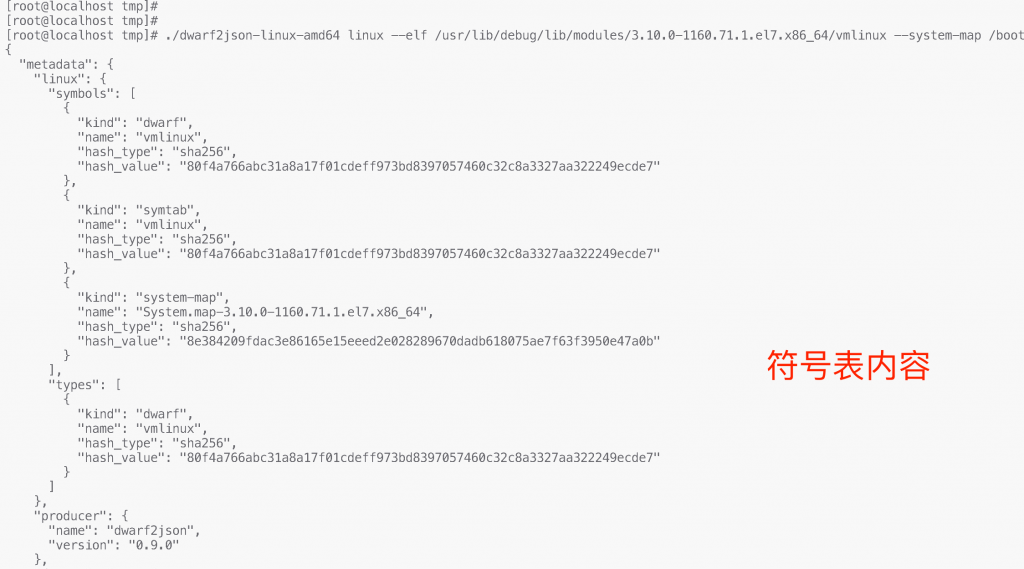
./dwarf2json-linux-amd64 linux --elf /usr/lib/debug/lib/modules/$(uname -r)/vmlinux --system-map /boot/System.map-$(uname -r)
这个可以作为通用的命令,实际执行如下,测试没有问题就导出为json文件。
./dwarf2json-linux-amd64 linux --elf /usr/lib/debug/lib/modules/3.10.0-1160.71.1.el7.x86_64/vmlinux --system-map /boot/System.map-3.10.0-1160.71.1.el7.x86_64 >centos7.json
如果执行报错显示killed,说明当前机器内存太小oom了,确保系统有至少8GB内存。
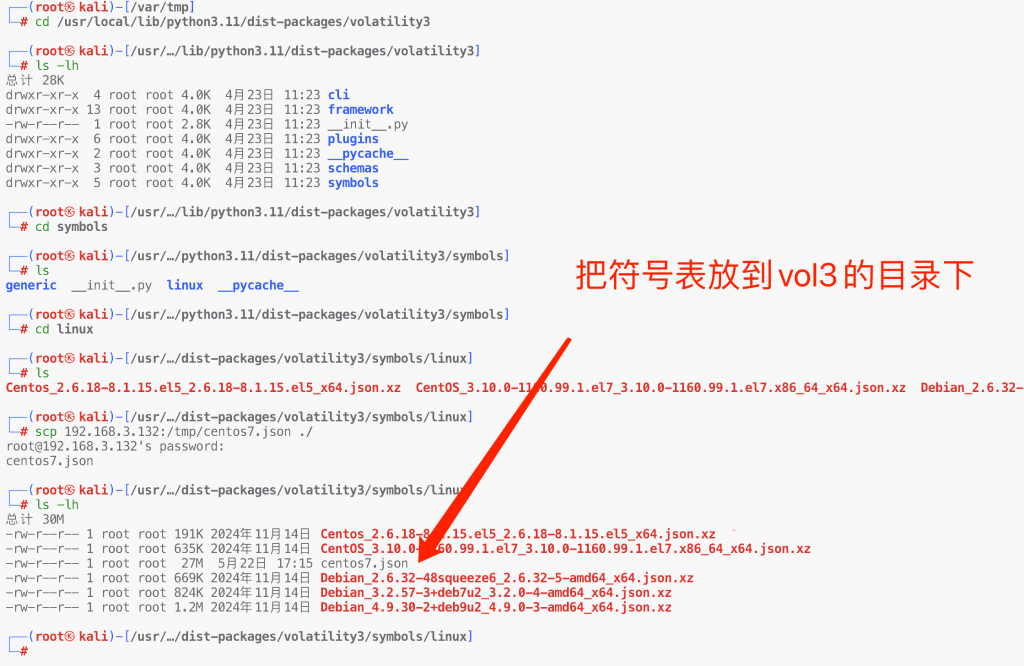
拷贝符号表到vol3的symbols目录下
vol isfinfo
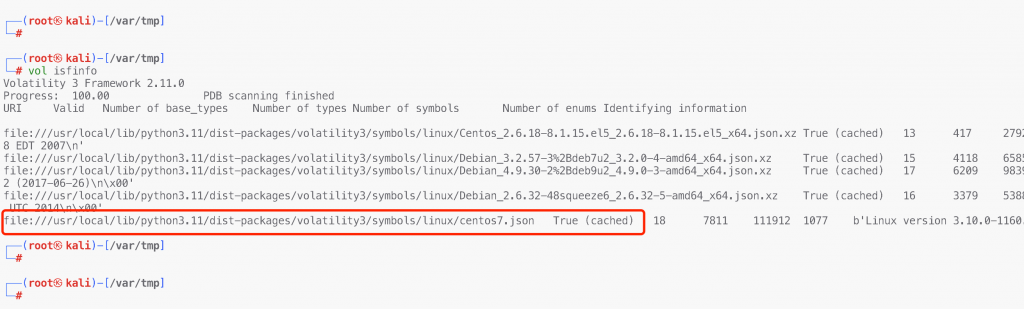
如果能正常显示刚才的符号表说明被vol3识别到了,然后再运行vol3就能正常分析Linux的内存。
赞赏 微信赞赏
微信赞赏 支付宝赞赏
支付宝赞赏
发表评论